Skip to content

Testing Dossier Reports in Rails

One of the things I love about developing with rails is the vast array of open source, free components that you can drop in and extend your application.  Want an invoicing system?  Way to run your javascript testsSimple admin portal?  Just drop in a gem, run bundle install and you are good to go.

One of the gems I’ve used recently was dossier, which lets you write reports in SQL or active record, and then generate them in HTML or CSV (or JSON, but I didn’t use that). One tip–if you want your CSV results to have the same formatting as your HTML results, you’ll want to follow the steps on this issue.

I wrote up a couple of SQL reports, linked them into the appropriate admin pages, and called it good. Then, the app moved on, and at one point, the schema changed. (Some of you are shaking your head, knowing what is going to happen next.) Then, the reports failed.

I had forgotten the cardinal rule–write the tests first. I confess, I wasn’t sure how to, but a bit of research revealed that it wasn’t that hard. Here’s one of my spec files.

require 'spec_helper'

describe MonthlyHoursClientReport do

  # all this does is test that the SQL is valid
  it "sql valid" do
    report = MonthlyHoursClientReport.new
    sql = report.sql
    sql = replace_placeholders(sql)
    expect{ActiveRecord::Base.connection.execute(sql)}.to_not raise_error
  end

  def replace_placeholders(sql)
    sql = sql.gsub(":kitchen_id",1.to_s)
  end
end

This just gets the SQL from the dossier report and tries to execute the SQL in the test database. Super simple, but enough to catch the error I encountered. If/when I get more time, I could definitely add some more tests with some data in the test db to make sure the SQL is giving correct results, but I tend to be pretty confident in my SQL queries, especially when they don’t have any group by or having clauses.

Anyway, happy testing.
Perils of ORM caching

So, I was working a rails4 project today and added an after_create method to a model (call it model A) that checked on a related object (call it model B) to see its state, and if it met a certain criteria, did something to the model A object being created. The specifics don’t really matter, but I was using zeus to run my rpsec tests.

This caused three tests to fail in entirely unrelated sections of the application.

What on earth was going on?

Well, first I used git bisect to determine the exact commit that caused the issue.  (As far as I’m concerned, the existence of git bisect confirms my belief to ‘commit early, commit often’).

Then I dug in.  It appears that each of the tests was tweaking the model B object, and testing some aspect of the change, usually through the model A object.  Before I added the after_create method, the model B object wasn’t loaded into the ActiveRecord in memory network graph tied to the model A object when the test saved the model A object initially, but was loaded from the database when the method under test executed.

After the after_create method was added, the model B object was loaded into the in memory network graph tied to the model A object.  Then the test tweaked the model B object in the database, but didn’t reload the model A object, which had a dirty/old version of the model B object.

A simple reload of model A (and its network graph) fixed it (or a repositioning of when I modified the model B object), but it was quite a subtle testing bug to track down.

Python Minesweeper Programming Problem

At an interview, I was asked to build a python program, using TDD, which would output the results of a minesweeper game.  Not a fully functional game, just a small program that would take an array of bomb locations and print out a map of the board with all values exposed.

So, if you have a 3×3 board, and there is a bomb in each corner, it would print out something like this:

x 2 x
2 4 2
x 2 x

Or if you have a 3×3 board and there is only a bomb in the upper left corner, it would print out something like this:

x 1 0
1 1 0
0 0 0

I did not complete the task in the allotted time, but it was a fun programming exercise and I hope illuminating to the interviewers. I actually took it home and finished it up. Here’s the full text of the program:

class Board:
        def __init__(self, size = 1, bomblocations = []):
		self._size = size
		self._bomblocations = bomblocations
    	
	def size(self):
		return self._size
    	
	def _bombLocation(self,location):
                for onebomblocation in self._bomblocations:
                	if onebomblocation == location:
				return 'x'

	def _isOnBoard(self,location):
		if location[0] =self._size:
		    	return False
		if location[1] >=self._size:
		    	return False
		return True

	def whatsAt(self,location):
		if self._bombLocation(location) == 'x':
			return 'x'
		if not self._isOnBoard(location):
			return None
		return self._numberOfBombsAdjacent(location)

	def _numberOfBombsAdjacent(self,location):
		bombcount = 0
		# change x, then y
		currx = location[0] 
		curry = location[1] 
		for xincrement in [-1,0,1]:
			xtotest = currx + xincrement
			for yincrement in [-1,0,1]:
				ytotest = curry + yincrement
				#print 'testing: '+ str(xtotest) + ', '+str(ytotest)+ ', '+str(bombcount)
				if not self._isOnBoard([xtotest,ytotest]):
					continue	
				if self._bombLocation([xtotest,ytotest]) == 'x':
					bombcount += 1
		return bombcount

	def printBoard(self):
		x = 0
		while x < self._size:
			y = 0
			while y < self._size:
				print self.whatsAt([x,y]),
				y += 1
			x += 1
			print
				
def main():
	board = Board(15,[[0,1],[1,2],[2,4],[2,5],[3,5],[5,5]])
	board.printBoard()

if __name__ == "__main__": 
	main()

And the tests:

import unittest
import app

class TestApp(unittest.TestCase):

    def setUp(self):
    	pass

    def test_board_creation(self):

        newboard = app.Board()
        self.assertIsNotNone(newboard)

    def test_default_board_size(self):
     	newboard = app.Board()
        self.assertEqual(1, newboard.size())	

    def test_constructor_board_size(self):
     	newboard = app.Board(3)
        self.assertEqual(3, newboard.size())	

    def test_board_with_bomb(self):
     	newboard = app.Board(3,[[0,0]])
        self.assertEqual('x', newboard.whatsAt([0,0]))	

    def test_board_with_n_bombs(self):
     	newboard = app.Board(4,[[0,0],[3,3]])
        self.assertEqual('x', newboard.whatsAt([0,0]))	
        self.assertEqual('x', newboard.whatsAt([3,3]))	

    def test_board_with_bomb_check_other_spaces_separated_bombs(self):
     	newboard = app.Board(4,[[0,0],[3,3]])
        self.assertEqual(1, newboard.whatsAt([0,1]))	
        self.assertEqual(1, newboard.whatsAt([1,0]))	
        self.assertEqual(1, newboard.whatsAt([1,1]))	
        self.assertEqual(0, newboard.whatsAt([1,2]))	
        self.assertEqual(0, newboard.whatsAt([2,1]))	
        self.assertEqual(1, newboard.whatsAt([3,2]))	
        self.assertEqual(1, newboard.whatsAt([2,3]))	
        self.assertEqual(1, newboard.whatsAt([2,2]))	

    def test_check_other_spaces_contiguous_bombs(self):
     	newboard = app.Board(4,[[0,1],[0,0]])
        self.assertEqual(1, newboard.whatsAt([0,2]))	
        self.assertEqual(2, newboard.whatsAt([1,0]))	
        self.assertEqual(0, newboard.whatsAt([2,1]))	

    def test_off_the_board(self):
     	newboard = app.Board(3,[[0,0],[1,2]])
        self.assertEqual(None, newboard.whatsAt([3,3]))	

This was written in python 2.7, and reminded me of the pleasure of small, from the ground up software (as opposed to gluing together libraries to achieve business objectives, which is what I do a lot of nowadays).

What a pleasurable way to learn a language!

This site was recommended to me, and I have to say, it is a fun way to become more familiar with the syntax of a language. There’s the journey aspect:

things are not what they appear to be: nor are they otherwise
your path thus far [...X______________________________________________] 19/280

and the fact that when you see something you want to investigate further, you just write another unit test:

  def test_slicing_arrays
    array = [:peanut, :butter, :and, :jelly]

    assert_equal [:peanut], array[0,1]
    assert_equal [:peanut,:butter], array[0,2]
    assert_equal [:and,:jelly], array[2,2]
    assert_equal [:and,:jelly], array[2,20]
    assert_equal [], array[4,0]
    assert_equal [], array[3,0] # my addition
    assert_equal [], array[4,100]
    assert_equal nil, array[5,0]
  end

Now, running through these koans certainly isn’t going to make me a Ruby expert, but I will have passing familiarity with the language and be ready to use it on my next small project.

Apparently I’ve been living under a rock, because there appear to be koans projects for quite a few languages: java, haskell, erlang (cue whatsapp reference), and even bash. I was, however, unable to find a koans package for assembler.

Testing time dependent kettle transformations

Testing transformations that depend on the date will often be required when you only want to process new data, or if you want to treat events that happened in the past differently depending on how long ago they occurred.

I have handled the time dimension in one of two ways.

The first is to have a SQL statement that is pulled in via a ‘Get Variables’ step.  This statement is then executed.  For the production job, the statement simply pulls the current date from the database: ‘select curdate()‘ for mysql.  For testing, the statement returns some known date: ‘select str_to_date(‘2012-05-27′,’%Y-%m-%d’)‘ for mysql.

The benefit to this is that you can make this SQL call in your transformation, and everything stays tidily in there.  The disadvantage is that you’re making another database call and mostly just for testing purposes.

The second is just to have a variable that is set previously in the job and is passed in to a transformation as a named parameter.  This date can be pulled from a file (for test), or using the ‘Get System Info’ step, or a database lookup (for production).  The benefit to this is that you aren’t necessarily making another database call and it is more understandable.  I can’t think of any downside, so this is my recommended method.

After this setup is done, you can pivot your test data around the hardcoded test date.  For example, if your data should change state one year after insertion, you can set the date in your input data rows to 364, 365 and 366 days from your test date.  This kind of condition testing ensures that when the logic changes (you should change state two years after insertion), your test will fail, and you will know about the issue before your users do.

This is content from my email newsletter about Pentaho Kettle Testing. To receive similar emails in your inbox, sign up below.

Signup for my infrequent emails about pentaho testing.

Older versions of Sinon.js don’t work with jquery 2.0

This is a quick hit, hopefully to help someone avoid spending the half day I just did.

The older versions of sinon.js, a helpful javascript testing tool which lets you mock up and stub out objects, do not work with jquery 2.0.  Even though 2.0 is API compatible with the 1.x series, apparently some different stuff happens under the covers.  This is an issue for me because a few months ago, I followed these instructions to set up our testing infrastructure, and used sinon.js version 1.4.2.  That worked fine with jquery 1.8.2, but when I upgraded everything, tests where I mocked up server calls failed–the backbone model’s parse method was never called.

The answer?  Use at least version 1.7.1 of sinon.js.

Testing with Pentaho Kettle – next steps

So, to review, we’ve taken a (very simple) ETL process and written the basic logic, constructed a test case harness around it, built a test suite harness around that test case, and added some logic and a new test case to the suite.  In normal development, you’d continue on, adding more and more test cases and then adding to your core logic to make those test cases pass.

This is the last in a series of blog posts on testing Pentaho Kettle ETL transformations. Past posts include:

Here are some other production ready ETL testing framework enhancements.

  • use database tables instead of text files for your output steps (both regular and golden), if the main process will be writing to a database.
  • run the tests using kitchen instead of spoon, using ant or whatever build system is best for your operation
  • integrate with a continuous integration system like hudson or jenkins to be aware when changes break the system
  • mock up external resources like database tables and web services calls

If you are interested in setting up a test of your ETL processes, here are some tips:

  • use a file based repository, and version your kettle files.  Being XML, job and transformation files don’t handle diffs well, but a file based repository is still far easier to version than in the database. You may want to try an XML aware diff tool to help with versioning difficultties.
  • let your testing infrastructure grow with your code–don’t try to write your entire harness in a big upfront effort.

By the way, testing isn’t cost free.  I went over some of the benefits in this post, but it’s worth examining the costs.  They include:

  • additional time to build the harness
  • hassle when you add fields to the output, because you have to go back and add them to all the test data as well
  • additional thought required to decide what to test
  • running the tests takes time (I have about 35 tests in one of my kettle projects and it can take about 10 minutes to run them all)

However, I still think, for any ETL project of decent size (more than one transformation) or that will be around for a while (any time long enough to evolve), an automated testing approach makes sense. 

Unless you can guarantee that business requirements won’t change (and I have news for you, you can’t!), testing can give you the ability to explore data changes and the confidence to make logic changes.

Happy testing!

Signup for my infrequent emails about pentaho testing.

Testing with Pentaho Kettle – adding new logic

We finally have a working test suite, so let’s break some code.  We have a new requirement that we greet users who are under the age of 30 with ‘howdy’ because that’s how the kids are saying ‘hello’ nowadays.

You just jumped into a series of blog posts on testing ETL transformations written with Pentaho Data Integration. Previous posts have covered:

The first thing we should do is write a test that exercises the logic we are trying to write.  We make a directory with a name descriptive of the behavior we are trying to test, and add a row to the tests.csv driver file pointing to the files in that directory. Here’s how the additional line will look:

agebasedgreeting,agebasedgreeting/input.txt,agebasedgreeting/expected.txt

And we will copy over the data files from the first test case we had (simplerun) and modify them to exhibit the expected behavior (a new greeting for users under 30). We don’t have to modify my input file, since it has people both under 30 and over 30 in it, but just to catch any crazy boundary conditions, we will add someone who is 30 and someone who is 31 (we already have Jane Doe, who is 29).

Then we need to modify the expected output file to reflect the howdyification of the greeting. You can check out both source files on github.

Then we run the tests.

pentaho-failed-test-75

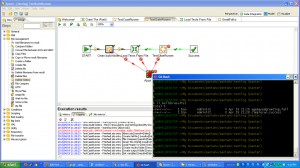
You can see the failure in the log file that kettle generates and in the build/results directory.  You can also see that we added a job entry to clean up the build directory so that when we run tests each time, we have a clean directory into which to write our output file.

pentaho-failed-test-75

Now that we have a failing test, we can modify the core logic to make the test pass. Writing the logic is an exercise left to the reader. (Or you could look at the github project :).

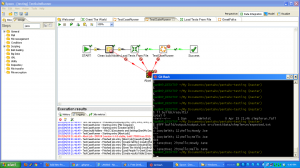
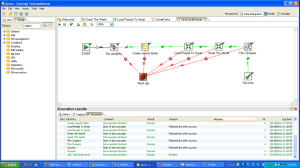
We re-run the tests to see if they pass, but it looks like simplerun fails before we can even test agebasedgreeting:

pentaho-failed-test-2-75

We can do a diff of the expected and output files and see that, whoops, the simplerun testcase had some users that were under 30 and affected by the logic change.

This points out two features of this method of testing:

  1. Regression testing is built in.
  2. Because of the way we are abort tests, TestSuiteRunner only runs until our first failure.

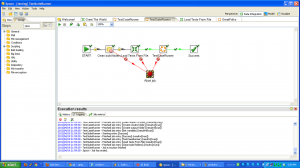
The easiest way to fix this issue is to inspect output.txt and verify that it is as expected for the simplerun test.  If so, we can simply copy it over to simplerun/expected.txt and use that file as the new golden table.

We also realize that we are passing in the hello field to the output.txt file and that doing so is no longer required.  So we can update the expected.txt in both directories to reflect that.  Running the tests again gives us success.

pentaho-success-75

Now that we’ve added code, I’ll look at some next steps you can take if you are interested in further testing your ETL processes.

Signup for my infrequent emails about pentaho testing.

Testing with Pentaho Kettle – the test suite runner

After we can run one test case, the next step is to run a number of test cases at one time.

Heads up, this article is part of a series on testing ETL transformations written with Pentaho Kettle. Previous posts covered:

Running multiple tests allows us to exercise logic in transformations by adjusting the input and expected output files. This allows you to test a number of edge cases easily.

pentaho-testsuite-runner-75

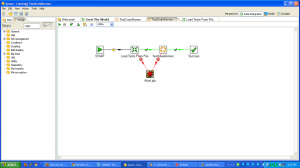
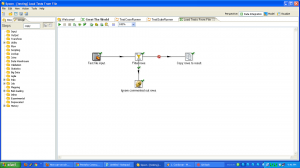
First, we need to build a CSV to drive the test cases.  Here is the test list file.  This file is read by a transformation that loads the rows and passes them to the next job entry.  The next job entry is the TestCaseRunner we saw in the last post, once for each line in the csv file.  As you can see below, we filter any rows that start with a #.  This behavior helps immensely when you are developing a new test, and don’t want to run all the other tests in your suite (typically because of how long it can take).

pentaho-load-tests-from-file-75

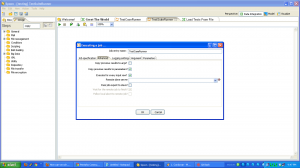
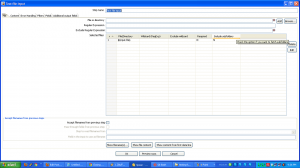
In order to drive each test case from the rows output by the Load Tests From File transformation, we need to modify the job settings of the TestCaseRunner.  Below we’ve checked the ‘copy previous results to parameters’ checkbox which takes the results output from the tests.csv file loaded by the previous transformations and uses them as parameters for the TestCaseRunner job.  We also checked the ‘execute for every input row’ checkbox which will execute the testcase once for each row. This lets us add a new test by adding a line to the file.

pentaho-testsuite-runner-drive-testcase-75

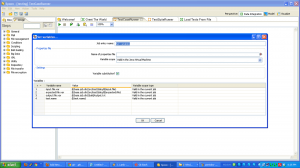
Obviously, taking these parameters requires modifications to the TestCaseRunner job.  Rather than have the input.file and expected.file variables hardcoded as we did previously, we need to take them as parameters:

pentaho-testcase-runner-modified-setvars-75

We also pass a test.name parameter, so that we can distinguish between tests that fail and those that succeed.  We also create a directory for test results that we don’t delete after the test suite is run, and output a success or failure marker file after a test is run.

pentaho-testcase-runner-modified-for-suite-75

You can run the TestSuiteRunner job in Spoon by hitting the play button or f9.

As a reminder, I’ll be publishing another installment of this tutorial in a couple of days–we’ll cover how to add new logic.  But if you can’t wait, the full code for the Pentaho ETL Testing Example is on github.

Signup for my infrequent emails about pentaho testing.

Testing with Pentaho Kettle – the test case runner

Now that we have our business logic, we need to build a test case that can exercise that logic.

FYI, this article is part of a series. Previous posts covered:

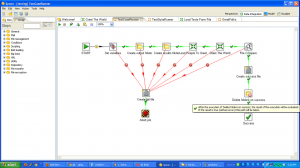
First, build out a job that looks almost like our regular job, but has a few extra steps. Below I’ll show you screen captures from spoon as we build out the business logic, but you can view the complete set of code on github.

pentaho-testcase-runner-75

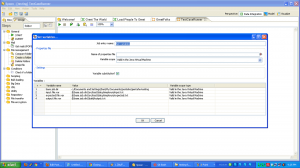
It sets some variables for input, output and expected files.  You can see below that we also set a base.job.dir variable which is used as a convenience elsewhere in the TestCaseRunner (for pulling in sample data, for example).

pentaho-testrunner-variables-75

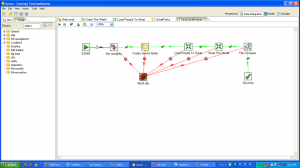
The job also creates a temp directory for output files, then calls the two transformations that are at the heart of our business logic.  After that, the TestCaseRunner compares the output and expected files, and signals either success or failure.

To make the business logic transformations testable, we have to be able to inject test files for processing. At the same time, in the main job/production, we obviously want to process real data. The answer is to modify the transformations to read the file to process from named parameters.  We do this on both the job entry screen:

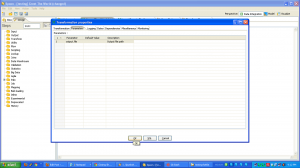
pentaho-parameter-job-screen-75

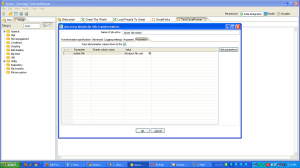
and on the transformation settings screen:

pentaho-parameter-transformation-screen-75

We also need to make sure to change the main GreetFolks main job to pass the needed parameters into the updated transformations.

Once these parameters are passed to the transformations, you need to modify the steps inside to use the parameters rather than hardcoded values.  Below we show the modified Text File Input step in the Load People To Greet transformation.

pentaho-parameter-text-input-file-75

The input and expected files are added to our project in the src/test/data directory and are placed under source control.  These are the data sets we vary to test interesting conditions in our code.  The output file is sent to a temporary directory.

So, now we can run this single test case in spoon and see if our expected values match the output values.  You can see from the logfile below that this particular run was successful.

pentaho-testcase-runner-success-75

The compare step at the end is our ‘assert’ statement.  In most cases, it will be comparing two files.  The expected output file (also called ‘golden’) and the output of the transformation.  The job step of File Compare works well if you are testing a single file.  If the comparison is between two database tables, you can use a Merge Rows step, and if all rows aren’t identical, fail.

You can run the TestCaseRunner job in spoon by hitting the play button or f9.

Next time we will look at how to run multiple tests via one job.

Signup for my infrequent emails about pentaho testing.